
Nvidia’s GeForce experience is an application to optimize the GeForce graphics card. For gamers, GeForce is like a blessing. The application allows customizing the game settings and keeps drivers up to date.
It also gives a feature to share your amazing games with your friends.
However, GeForce experience or Nvidia control panel is useful for people who play high-end games like Call of Duty or Assassin’s Creed. Otherwise, these two applications are not necessary for your machine.
Regular PC users do not need to have these two programs in their PC unless they are gamers. Moreover, running these applications on a startup in the background not only consumes the battery of your machine but also makes it slow.
Ways to Disable Nvidia GeForce Experience
If you are not into gaming and do not want GeForce experience to run in the background at startup, you can stop it using simple steps. Stopping Geforce experience from a startup is not that hard. Besides, it’s a recommended step for non-gamers.
For Windows 10 and Windows 8:
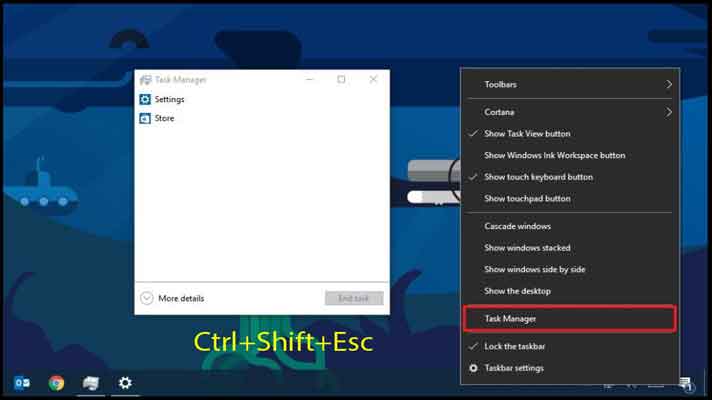
Step 1- Open Taskbar. Shortcut keys are Ctrl+Shift+Esc. Or type it on the search bar.
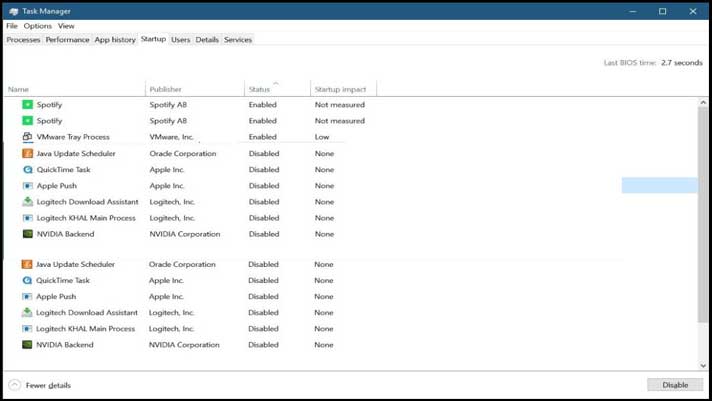
Step 2- After opening a Taskbar, Go to a Startup tab.
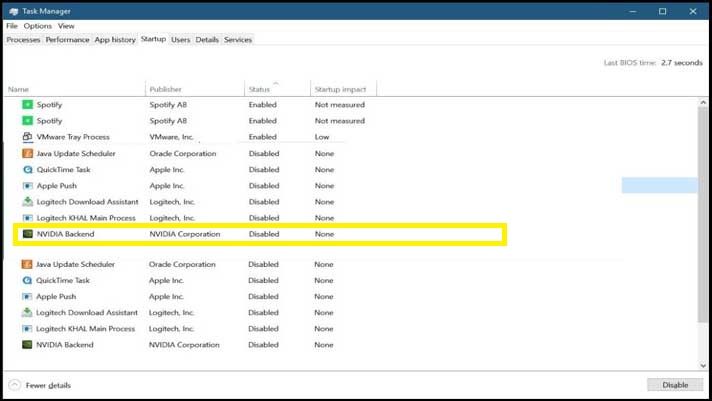
Step 3- Locate the Nvidia GeForce Experience from the list of apps and click on it.
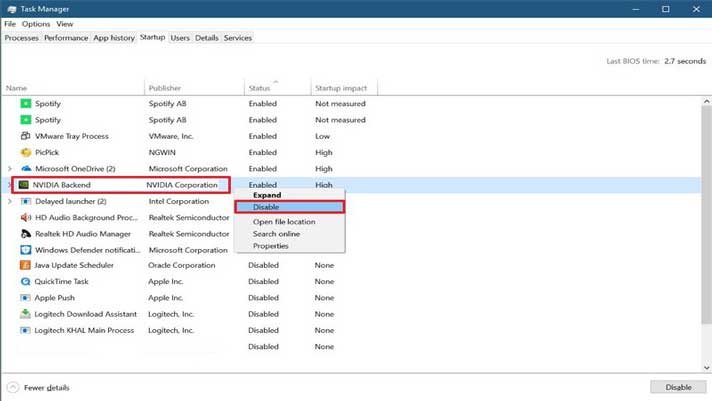
Step 4- Click Disable from a right-bottom corner. Restart the machine
That’s all you need to do to turn off GeForce Experience from Startup.
If you have Windows 7 or Vista, steps are a bit different.
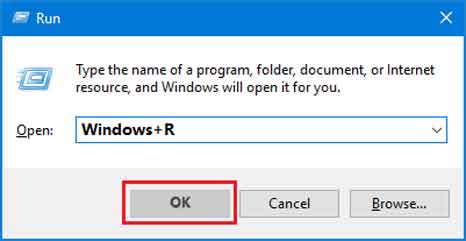
Step 1- Open Run program. Shortcut keys are Windows+R/r.
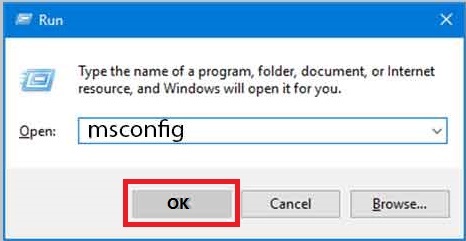
Step2- Type ms config and hit Enter.
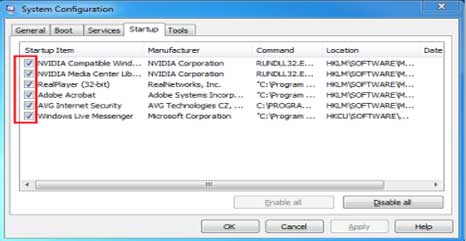
Step 3- Go to the Startup tab to locate GeForce experience
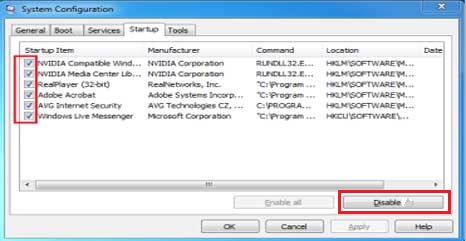
Step 4-Click Disable
Step 5- Restart your machine.
Uninstall Nvidia Geforce Experience
Taskbar might not show some of the GeForce drivers or programs in the Startup list. If the specifications of your PC/Laptop are not high-end, keeping GeForce Experience in your machine does not make any sense. Hence, it’s best to uninstall the whole thing.
If you are concerned about the performance of your graphics card, don’t worry, removing GeForce experience won’t affect graphics cards.
Steps to unistall GeForce Experience
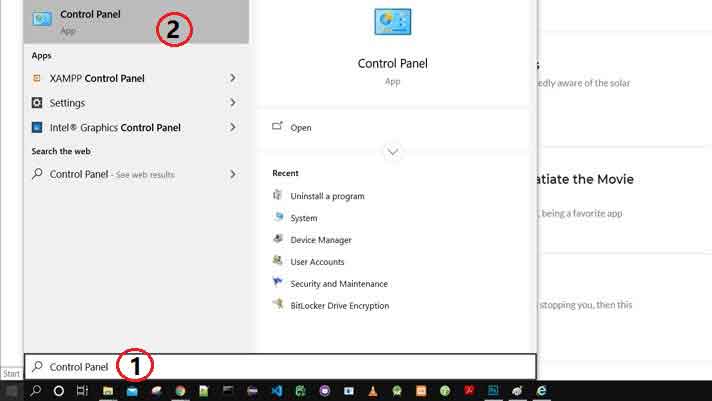
Step 1-Type Control panel in the search bar or go to the Start menu to locate the control panel.
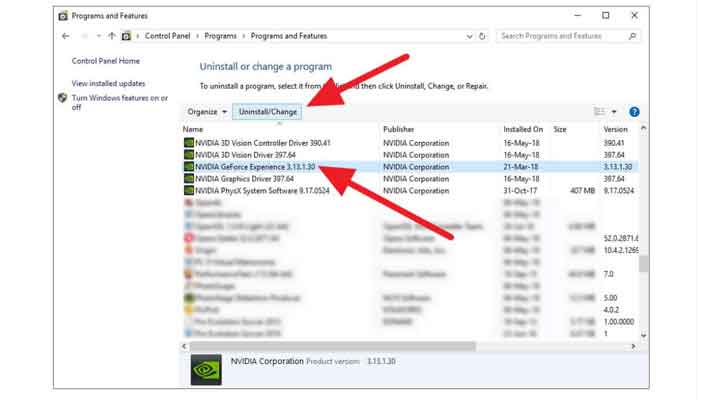
Step 2- When you click on it, a list of all installed programs will appear. Locate Geforce Experience.
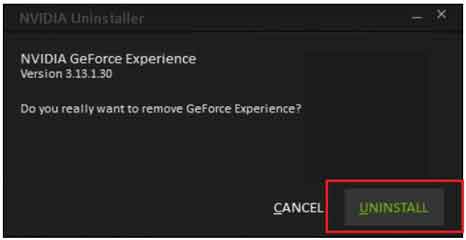
Step 3-Click Uninstall from the top bar. It will ask for confirmation, hit Uninstall Button.
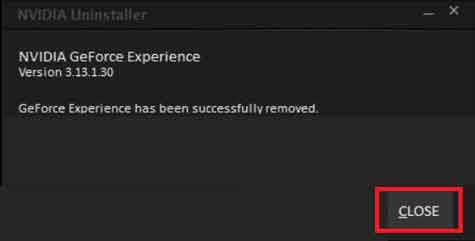
Step 4- Wait till completion of uninstallation, then click on Close
These steps will altogether remove the program from your machine without any harm to a graphics card. All the drivers and features of GPU will work normally. Moreover, you can reinstall the software if at all you need it.
Disabling GeForce from Services configuration
This could be the way when you don’t want to uninstall GeForce Experience yet wants to keep it nonfunctional. This step will disable all the drivers associated with the graphics card.
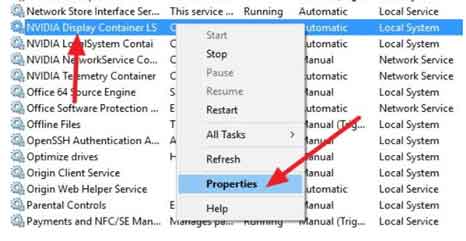
Step 3-Right-click on the same and go to properties
Step 4- Right-click on the same and go to properties
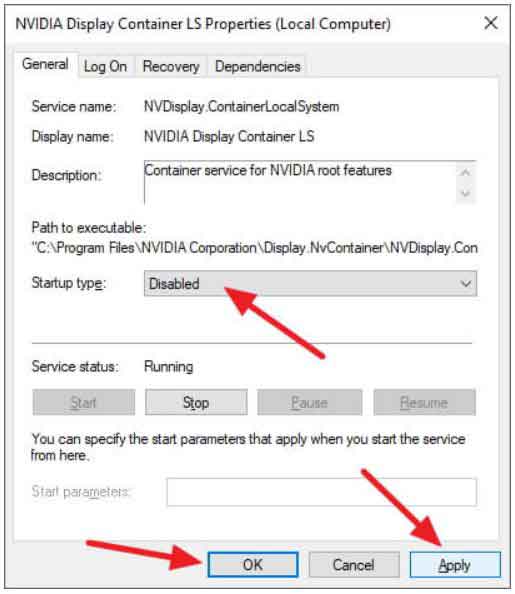
Step 5- Under the General tab, you will see a Startup type. Choose Disabled from the drop-down options.
Step 6-Click Apply and Ok.
Step 7-Restart your machine.
You can always change these settings and can reassess the program whenever you need it.
Nvidia’s control panel offers more customizations to your games for geeks. However, for smooth interface and easy customization, GeForce Experience comes handy. While installing the drivers, choose custom installation. You will be able to untick checkboxes of drivers that you are not going to need, hence, don’t have to install.
Final Verdict!
All the steps mentioned above are revertible. You don’t have to deal with the existence of the Geforce Experience if you do not want it in your machine right now. Otherwise, you can always get the functional GeForce programs back in your machine.